When you replace a door, start a renovation or in the middle of a new build, you’ll quickly discover that doors are more than just a slab of wood or glass. They’re a combination of multiple door parts that work together for function and style. Two of the most misunderstood components are the door jamb and door casing—and how they relate to door trim and moulding aesthetics.
Whether you’re a DIYer tackling your first install or someone looking for more knowledge before building their dream home, this guide will walk you through the basics of each part, show you where they fit in a door parts diagram, and help you choose the right casing styles for your project.
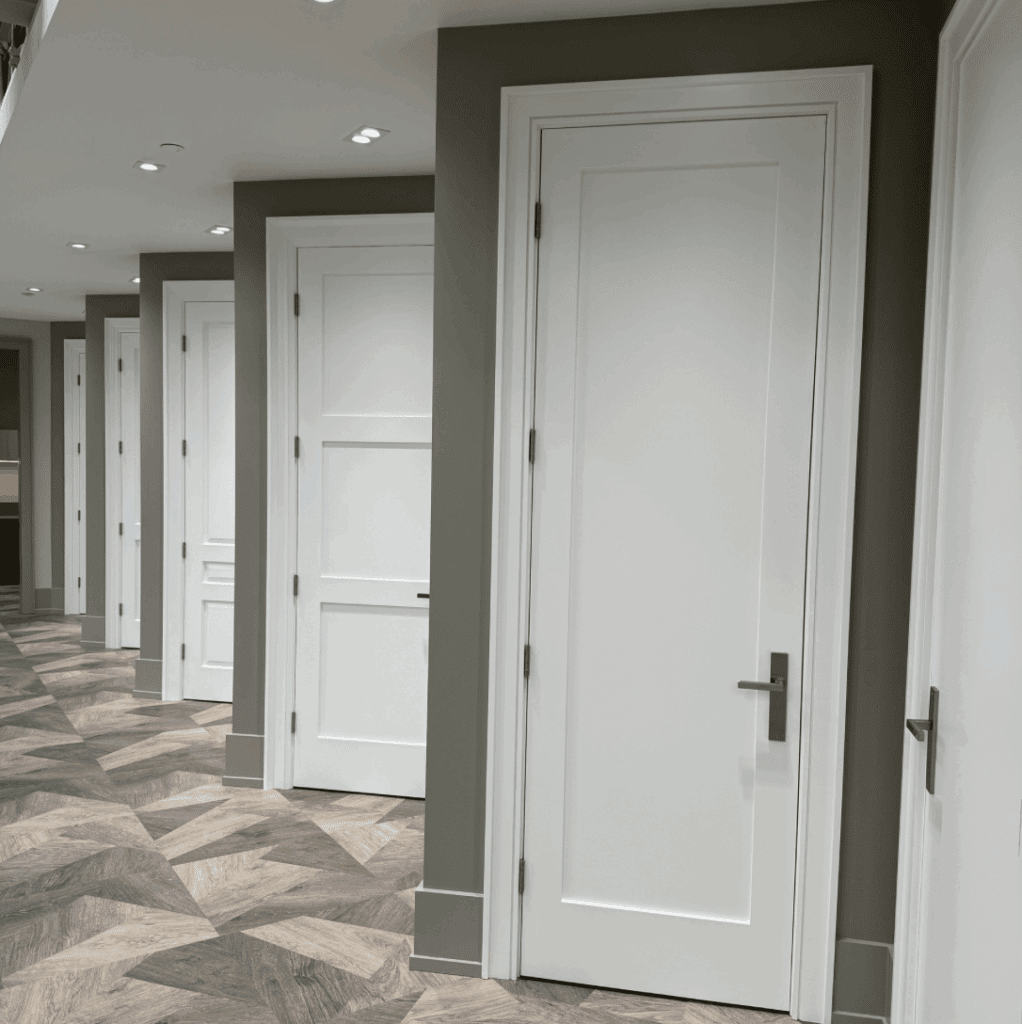
What is a Door Jamb?
The door jamb is the vertical frame on either side of the door, and the part that goes across the top, the side pieces, support the hinges and the door handle latch. It’s essentially the backbone of the wood door installation, holding everything in place inside the door frame.
Key Features:
- Structural support: The jamb is anchored to the wall framing, keeping the door stable. Using solid poplar door jambs will help ensure that the door does not sag over time. Poplar is the preferred material to use when it comes to hanging doors.
- Hinge mounting: The hinge side of the jamb carries the door’s weight.
- Latch and strike plate: The opposite side holds the latch hardware.
- Doorstop: Doorstop is placed on top of the jambs so when the door is closed, it covers the gap which is between the door and the jamb.
For exterior doors, door jambs need to be more robust to support heavier materials and weather sealing. For interior doors, thinner ¾” jambs are sufficient.
What is Door Casing?
While the door jamb is functional, the door casing is decorative and covers the gap between the wall stud, shims, and the jamb. Casing is a type of door trim that adds both a finished look and a layer of protection around the opening. Casing is also used to frame out windows if that is the desired look for the home.
Casing styles vary widely, from sleek bevel, to simple modern, and ornate traditional designs. The right choice can make a big impact on your overall aesthetic.
What is Door Trim (and How is it Different from Moulding)?
“Door trim” is a general term that includes any decorative woodwork framing the door, typically referring to the door casing and backband. Moulding is a broader category that also includes window trim, baseboard, wainscotting, and panel moulding, etc.
In other words:
- Door casing = a specific type of door trim.
- Moulding = all types of trim used in your home’s interior and exterior.
This distinction is important when you’re buying materials—you don’t want to confuse a panel moulding profile with a door casing profile unless you’re intentionally matching them.
Door Parts Diagram
When shopping for or installing doors, it’s helpful to understand each component:
- Door: The actual door pane itself that swings or slides.
- Door Jamb: Vertical frame on both sides and the top of the door.
- Casing: Decorative trim that goes around each door and window, covering the gap between the jamb and the wall stud.
- Doorstop: A small strip inside the jamb that the door closes against to hide the gap between the door and the jamb.
- Hinges and latch hardware: Functional parts that allow the door to swing and close securely.
Understanding each element helps you avoid costly mistakes during installation or when ordering materials.
Choosing Casing Styles
The right casing styles depend on your home’s architecture, door type, and budget.
Popular options include:
- Flat Stock: Minimal to no detail is best for minimalist and modern homes.
- Colonial and Ornamental: Curved, intricate, detailed profile for a traditional look.
- Bevelled: Great for any style of home with a minimal bevel profile with some lines to help tie into any style of home.
For a cohesive design, coordinate your door casing with your baseboard and window trim.
Installing or Replacing Door Jambs and Casings
Replacing a Door Jamb:
- Remove old casing, backband, and any other trim.
- Detach the existing jamb carefully to avoid damage to your drywall.
- Install new jambs—ensuring they’re plumb and level.
- Secure with shims and nails. Using shims can help straighten up off-square door openings and ensure a tight fit with your door jambs, which will help reduce movement over time.
Adding or Replacing Door Casing:
- Measure and cut the casing pieces at the correct angles. Use a mitre saw to create the 45-degree angles.
- Attach with finishing nails to the wall framing.
- Fill any nail holes with wood filler and sand smooth.
- Prime and paint to seal.
A well-fitted door casing not only looks great but also hides any minor installation imperfections.
Matching Door Trim with the Rest of Your Home
Consistency is key. Your door trim should work with:
- Window trim: Matching window casing profiles to the door casing is typical in order to tie the room together.
- Baseboard: Coordinating height of the baseboard to the ceiling and door heights, will help ensure visual flow.
If you’re updating multiple rooms, consider running the same trim or casing profile throughout the house for a unified look.
Common Mistakes to Avoid
When working with door jambs, casings, and trim, watch out for these pitfalls:
- Mismatched profiles between doors and other trim elements.
- Improper jamb installation leading to doors that don’t close properly.
- Skipping caulk—leads to visible gaps and drafts.
Final Thoughts
The door jamb, door casing, and door trim are more than just functional—they’re essential design elements that define the look of your home.
By understanding the differences between these door parts—and how to choose and install the right casing styles—you’ll be equipped to take on your next door project with confidence.
Reach out to our sales team or book yourself a showroom appointment and our experts can help you decide on styles without sacrificing function.